How to Transfer Photos to Glass
Transferring photos onto simple glass is a unique way to decorate your living space. It is also a popular item that people like to own and give to others for special occasions and events. There are various methods of transferring photos to glass, our focus is on laser engraving as it provides impeccable results. The precision and quality of the engraving are up to par.
If you're a laser enthusiast looking to try something creative and fun, transferring photos to a piece of glass is a must. We'll give you a complete step-by-step tutorial to easily transfer any photo or picture to a piece of glass.
Can photos be transferred to glass by laser engraving?
A laser engraver can engrave any pattern, intricate design, photo or whatever you want on a variety of materials including glass. But keep in mind that not all laser machines are suitable for glass laser engraving. Only diodes and CO2 lasers can do the job. Second, the quality of engraving depends on the precision of the laser machine. The smaller the laser spot, the higher the accuracy.
The photo you want engraved on glass needs to be thoroughly edited for best results. You need to consider some important things.
First, the resolution of the image plays an important role. If the resolution is too low, spaces and gaps are left in the image. On the other hand, if the resolution is too high, the matte will be too deep and crowded. It reduces the overall quality of the engraving. Choose the appropriate resolution according to the size. You can use 300-500 DPI, or whatever looks perfect.
The next important thing is the color of the image. It should be black and white, and the lighting should be equal. To do this, you'll need to make gamma, contrast, and brightness adjustments.
The most important thing about photo editing is inversion. You also need to invert the colors of the image. This means that black should become white and vice versa. The laser will engrave the black areas, while the white areas will remain untouched. You can also engrave without inverting, but it gives great results.
Note: Flipping horizontally is not required; it depends on your choice.
For the above edits, you can use any of your favorite photo editing tools such as GIMP, Adobe Photoshop or ImagR. Apart from these edits, you can also crop the image, remove objects or do whatever you need.
What type of laser do you need to transfer photos to glass?
We mentioned before that diode and CO2 lasers can engrave glass. Let's discuss why and how these lasers do the job.
carbon dioxide laser
CO2 lasers are the first choice for glass engraving. This is because the emitted laser beam has a wavelength of about 10,000 nm. This wavelength is easily absorbed by glass, so you can engrave directly without any hassle. A benchtop CO2 laser is more than adequate for the job. You can use a 30W or more powerful CO2 laser machine. But keep in mind that these laser machines are quite expensive compared to diode lasers.
diode laser
Diode lasers can also engrave glass. They produce blue laser light with a wavelength of about 450-455nm. The problem with diode lasers is that the laser beams go straight through the glass; they are not absorbed. Therefore, glass cannot be engraved directly with a diode laser. You'll need marker paper, paint, backing material, or something similar.
We've already discussed that the frosted look on glass is caused by heat, which starts molecular expansion on the surface. When light passes through the glass without being absorbed, the temperature does not rise and no heat is generated. Therefore, backing material, paint or marking paper must be used to absorb heat.
These lasers are very affordable compared to CO2 lasers. Glass can be easily engraved with a diode laser if you know the correct steps. Let's take a look at the detailed step-by-step guide.
How to transfer photos to glass?
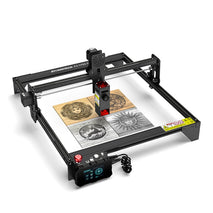
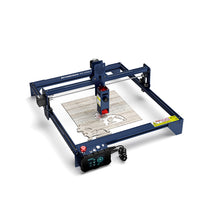
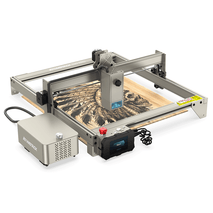
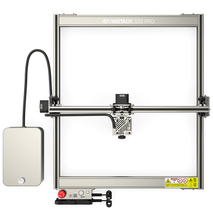
We'll show you how to laser engrave photos on glass with the Atomstack A10 Pro. The Atomstack A10 Pro is a diode laser, so it can transfer photos to glass. But you need to use something to trap the heat. Marker stock and backing material are the easiest and fastest options. We will demonstrate both here.
Step 1: Prepare the image. Choose high-quality images for editing. You can edit images through any software, but here, we used ImagR, which is an online tool.
Visit the site and upload an image. Crop the image, then resize it, including DPI. Now, select the material, in our case glass. It will automatically generate an image suitable for glass engraving. Afterwards, you can also make some advanced changes such as gamma adjustments, sharpness, brightness, mirroring, and more.
Step 2: Your image is ready. Now, turn on the laser machine and connect it to the computer. Import the image into the laser engraving software. XCS also helps you resize images and invert black and white colors. This means you can also edit images directly on the software.
You need to enter the best engraving settings based on your image and machine. We are using Atomstack A10 Pro. Set to 100% power, 80mm/s speed and 300 lines per cm. We chose the grayscale bitmap mode, but you can choose other modes as well. Some users have had great results with the Atkinson and Jarvis model.
You may need to try a few times to get the best settings. It depends on the photo and the machine you use. So don't worry if you don't succeed on your first try.
Step 3: Clean the glass with glass cleaner, isopropyl alcohol, or anything else. Make sure there is no dust or fingerprints on it.
If you are using marker paper, soak it in water for five minutes. Peel off the backing of the marker paper and stick it to the glass. Carefully spread out the marker paper and allow to dry. You can also use a blow dryer for quick results.
If marker paper is not available, backing material can be used. It can be anything that absorbs heat, but it should be dark. Black is recommended for great results. You can use plywood or any wood board. Put the backing material under the glass.
Remember that when you engrave with marker paper, the engraving is done on the surface you apply it to. However, when you use a backing material, the engraving is done on the surface adjacent to the backing material. This means that the surface facing the laser bed will be engraved while the front surface of the glass will remain intact. So you may need to mirror the image in this case.
Step 4: Place glass on work area. Adjust the focus of the laser machine. Click Processing, then click Frames. Once the image is framed on the glass, the process can begin.
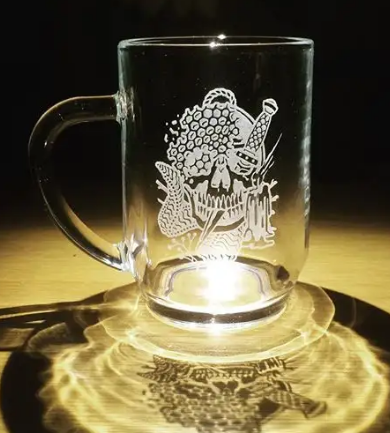
Step Five: When you're done, remove the glass and clean it. Place it on a dark background to see crisp results. Your photo has been successfully transferred to Glass.
The picture can be transferred to the glass using a laser machine. You can use diode or CO2 lasers for this. The engraving on the glass looks frosted. It can display photos clearly. We've discussed at length how to transfer photos to glass. You can use the Atomstack A10 Pro by following the steps below to achieve impeccable results. It may take you a few tries before you become an expert in glass laser engraving.
If you're a laser enthusiast looking to try something creative and fun, transferring photos to a piece of glass is a must. We'll give you a complete step-by-step tutorial to easily transfer any photo or picture to a piece of glass.
Can photos be transferred to glass by laser engraving?
A laser engraver can engrave any pattern, intricate design, photo or whatever you want on a variety of materials including glass. But keep in mind that not all laser machines are suitable for glass laser engraving. Only diodes and CO2 lasers can do the job. Second, the quality of engraving depends on the precision of the laser machine. The smaller the laser spot, the higher the accuracy.
The photo you want engraved on glass needs to be thoroughly edited for best results. You need to consider some important things.
First, the resolution of the image plays an important role. If the resolution is too low, spaces and gaps are left in the image. On the other hand, if the resolution is too high, the matte will be too deep and crowded. It reduces the overall quality of the engraving. Choose the appropriate resolution according to the size. You can use 300-500 DPI, or whatever looks perfect.
The next important thing is the color of the image. It should be black and white, and the lighting should be equal. To do this, you'll need to make gamma, contrast, and brightness adjustments.
The most important thing about photo editing is inversion. You also need to invert the colors of the image. This means that black should become white and vice versa. The laser will engrave the black areas, while the white areas will remain untouched. You can also engrave without inverting, but it gives great results.
Note: Flipping horizontally is not required; it depends on your choice.
For the above edits, you can use any of your favorite photo editing tools such as GIMP, Adobe Photoshop or ImagR. Apart from these edits, you can also crop the image, remove objects or do whatever you need.
What type of laser do you need to transfer photos to glass?
We mentioned before that diode and CO2 lasers can engrave glass. Let's discuss why and how these lasers do the job.
carbon dioxide laser
CO2 lasers are the first choice for glass engraving. This is because the emitted laser beam has a wavelength of about 10,000 nm. This wavelength is easily absorbed by glass, so you can engrave directly without any hassle. A benchtop CO2 laser is more than adequate for the job. You can use a 30W or more powerful CO2 laser machine. But keep in mind that these laser machines are quite expensive compared to diode lasers.
diode laser
Diode lasers can also engrave glass. They produce blue laser light with a wavelength of about 450-455nm. The problem with diode lasers is that the laser beams go straight through the glass; they are not absorbed. Therefore, glass cannot be engraved directly with a diode laser. You'll need marker paper, paint, backing material, or something similar.
We've already discussed that the frosted look on glass is caused by heat, which starts molecular expansion on the surface. When light passes through the glass without being absorbed, the temperature does not rise and no heat is generated. Therefore, backing material, paint or marking paper must be used to absorb heat.
These lasers are very affordable compared to CO2 lasers. Glass can be easily engraved with a diode laser if you know the correct steps. Let's take a look at the detailed step-by-step guide.
How to transfer photos to glass?
We'll show you how to laser engrave photos on glass with the Atomstack A10 Pro. The Atomstack A10 Pro is a diode laser, so it can transfer photos to glass. But you need to use something to trap the heat. Marker stock and backing material are the easiest and fastest options. We will demonstrate both here.
Step 1: Prepare the image. Choose high-quality images for editing. You can edit images through any software, but here, we used ImagR, which is an online tool.
Visit the site and upload an image. Crop the image, then resize it, including DPI. Now, select the material, in our case glass. It will automatically generate an image suitable for glass engraving. Afterwards, you can also make some advanced changes such as gamma adjustments, sharpness, brightness, mirroring, and more.
Step 2: Your image is ready. Now, turn on the laser machine and connect it to the computer. Import the image into the laser engraving software. XCS also helps you resize images and invert black and white colors. This means you can also edit images directly on the software.
You need to enter the best engraving settings based on your image and machine. We are using Atomstack A10 Pro. Set to 100% power, 80mm/s speed and 300 lines per cm. We chose the grayscale bitmap mode, but you can choose other modes as well. Some users have had great results with the Atkinson and Jarvis model.
You may need to try a few times to get the best settings. It depends on the photo and the machine you use. So don't worry if you don't succeed on your first try.
Step 3: Clean the glass with glass cleaner, isopropyl alcohol, or anything else. Make sure there is no dust or fingerprints on it.
If you are using marker paper, soak it in water for five minutes. Peel off the backing of the marker paper and stick it to the glass. Carefully spread out the marker paper and allow to dry. You can also use a blow dryer for quick results.
If marker paper is not available, backing material can be used. It can be anything that absorbs heat, but it should be dark. Black is recommended for great results. You can use plywood or any wood board. Put the backing material under the glass.
Remember that when you engrave with marker paper, the engraving is done on the surface you apply it to. However, when you use a backing material, the engraving is done on the surface adjacent to the backing material. This means that the surface facing the laser bed will be engraved while the front surface of the glass will remain intact. So you may need to mirror the image in this case.
Step 4: Place glass on work area. Adjust the focus of the laser machine. Click Processing, then click Frames. Once the image is framed on the glass, the process can begin.
Step Five: When you're done, remove the glass and clean it. Place it on a dark background to see crisp results. Your photo has been successfully transferred to Glass.
The picture can be transferred to the glass using a laser machine. You can use diode or CO2 lasers for this. The engraving on the glass looks frosted. It can display photos clearly. We've discussed at length how to transfer photos to glass. You can use the Atomstack A10 Pro by following the steps below to achieve impeccable results. It may take you a few tries before you become an expert in glass laser engraving.
Older Post
 Newer Post
How to Laser Engrave a Mug

Personalized Father's Day Gifts He'll Really Love

